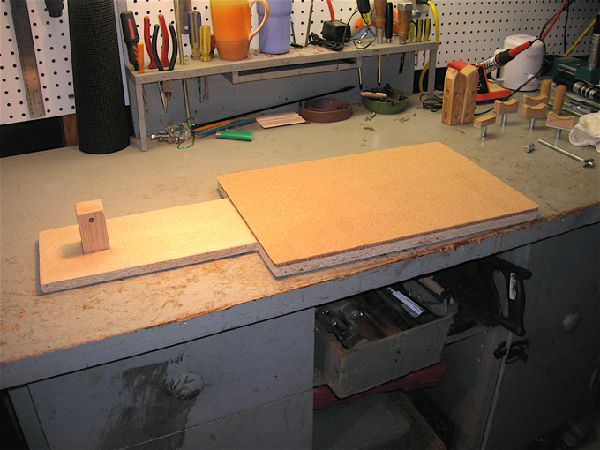
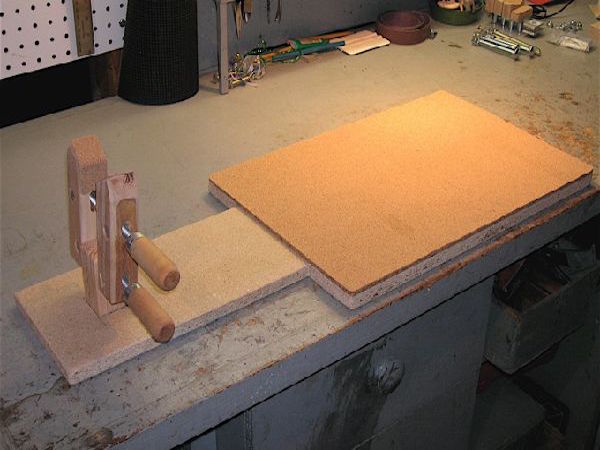
When the decision is made and you're going to glue the frets in, this little caul comes in handy. Using a Stew-Mac neck caul on the back, this one goes over the frets and holds them down while drying...
Two 1/4" oak dowells on a 1/2"X21/2"X18" oak plank. The dowells are flattened on one side and glued to the plank to match the gradual widening of the fretboard. Use on any radius neck...
I run into a situations while regluing loose braces where its hard to twist a turnbuckle jack or even operate a scissor jack. I needed a jack that could be operated with one hand and that had variable tension for a given job...
I came up with a spring loaded jack that can be set with one hand and use different spring lengths and load rates. Using a 1 1/8" hardwood dowel, 3" bolts, some cork sheet and a few different springs I made four jacks that work just perfectly...
The two wooden blocks are laminated oak 1" X 2" planks (2). They have been tapered and sanded for fret file handles. The files are cut from single cut, second step mill files. The files were made in the shop at work with a die grinder and a large bench grinder. The end edges of the files on the single cut side are beveled so they will not catch on the frets. Using a two part epoxie, glue the files on to the bottoms of the handles with the single cut mill side out. They only file in one direction...
The files are the same single cut, second step mill files used for the fret files above. They are also beveled on the ends to avoid catching on the fret ends. If you look closely at the ends of the handles, you will see the cuts that run length ways down the handle (click on photo). These were cut on a table saw, one at 20 degress and one at 30 degrees so the files fit snug in the cut. This is so when the files eventually wear out, they can be replaced with new files...
In the photo, you can see the clamps that hold the files in the slots. The aluminum clamp plates are slightly bowed length ways to put pressure on the wood when the bolts are tightened to hold the files in place. This makes the handles re-usable instead of gluing the files in and throwing them away when the files wear out...
The file edge extending below the edge of the clamp plates is just enough to mill the ends of the frets. Always test your hand made tools out on garage sale guitars before putting them into real time use. Testing leaves room for error and corrections. These files turned out really well and prepare fret ends to general bevel for final dressing.
I designed and built a bench guitar workstation. This became the centerpoint of the majority of guitar work and has been a real workhorse throught the years...
With a 6" wood clamp, a large piece of press board, some cork sheets, a hardwood block and some rubber feet, I was in business. The cork lined clamp can hold guitar necks, it is a rest and the clamp folds out of the way...
I keep a neck jig around the shop for varius neck repair including crack and break repairs, fret leveling and truss rod nut repairs when I need the neck level...
Made to clamp into a Black & Decker Workmate, this was a more complex jig to build...
When I saw this I knew this was a good idea. This is split suade ordered thick, but as you can see is very supple as well...
I ordered the suade from Tandy Leather Factory and was only $35.00 for two large sheets and included shipping and tax...
After fiddling around with a straight edge over two adjacent frets and feeler guages trying to figure out fret heights, I wanted to know the fret heights, not the space between the two frets...
Once you have set it up by leveling it on a piece of glass, locking the base and setting the dial to zero, you can zip along measuring frets length ways and across the fret board...
I found this Fret Buck at Stewart-McDonald and wanted to try one. By the time I decided to buy one, I couldn't get one. I went to work building this one, and I'm glad I did...
The Buck clamps to the cross brace underneath the fretboard tongue and diperses energy created while installing frets by dampening the top wood and bracing...
The bottom of the Fret Buck and the top of the clamp pad are lined with cork padding. Align the brace on the clamp pad and apply light pressure using the thumb wheel...